Covered patios and daylight
Start with the Melbourne patio guide, then review the Clearview roof and the measured conditions that affect fit.
The completed projects below are verified Clearview installations. Use the planning guides to understand patio fit, existing structures, roof trade-offs and indicative pricing without treating every example as a promise for a new site. Locations are shown at suburb or regional level to protect customer privacy.
These guides explain the decision points. Verified project pages remain clearly identified in the section below.
Start with the Melbourne patio guide, then review the Clearview roof and the measured conditions that affect fit.
Check condition, connections, roof fall and drainage before assuming an existing frame can carry a new Clearview roof.
Use daylight, rain cover, adjustability and the adjoining room to decide whether fixed transparent roofing fits the brief.
Review the indicative planning example and the comfort questions that need a measured site answer.
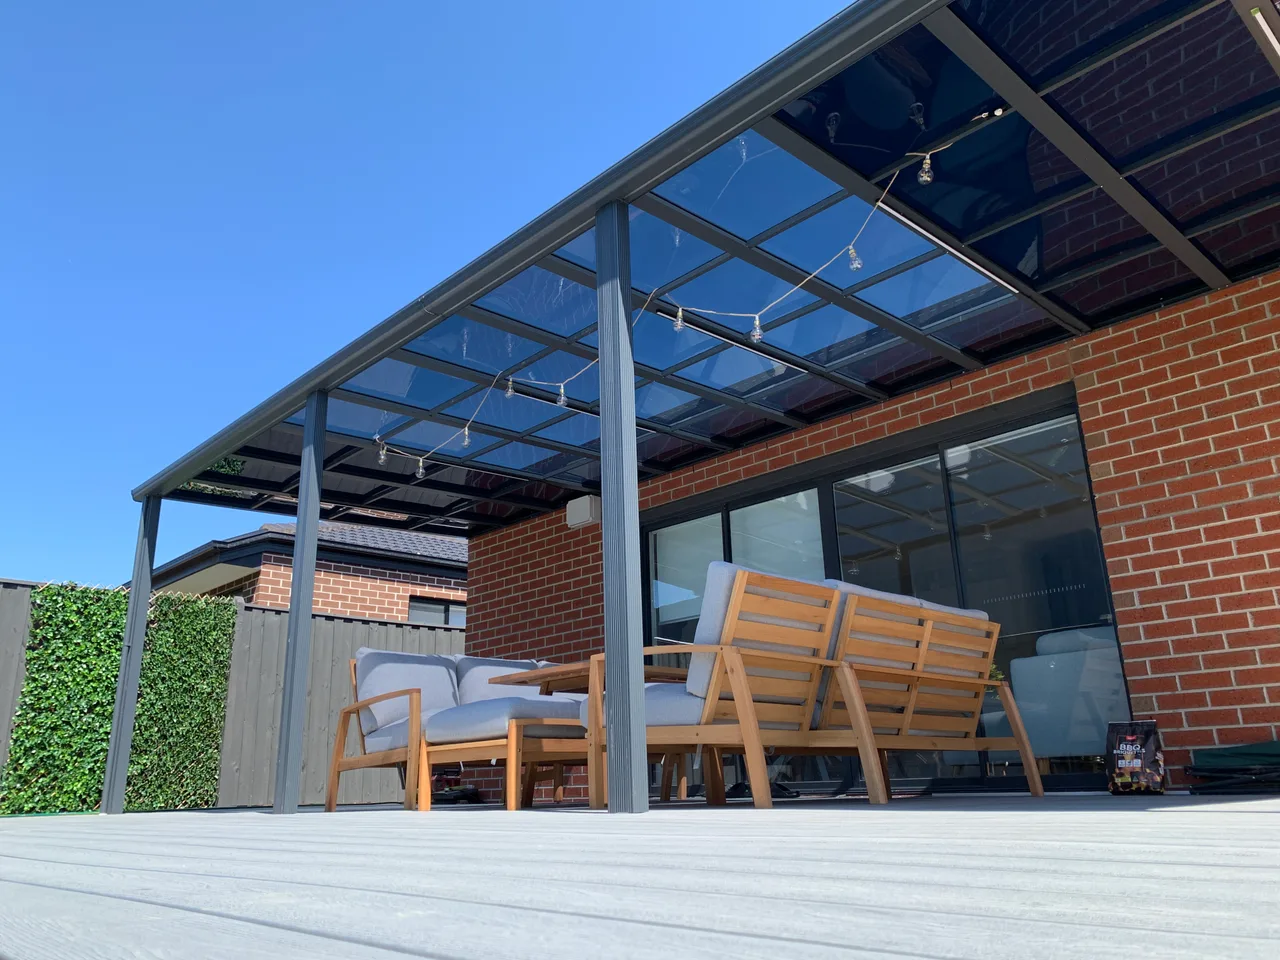
A rear house connection and front support posts carry the roof frame. Two panel tint levels were arranged around the daylight beside the living room and the direct sun over the outer zones.
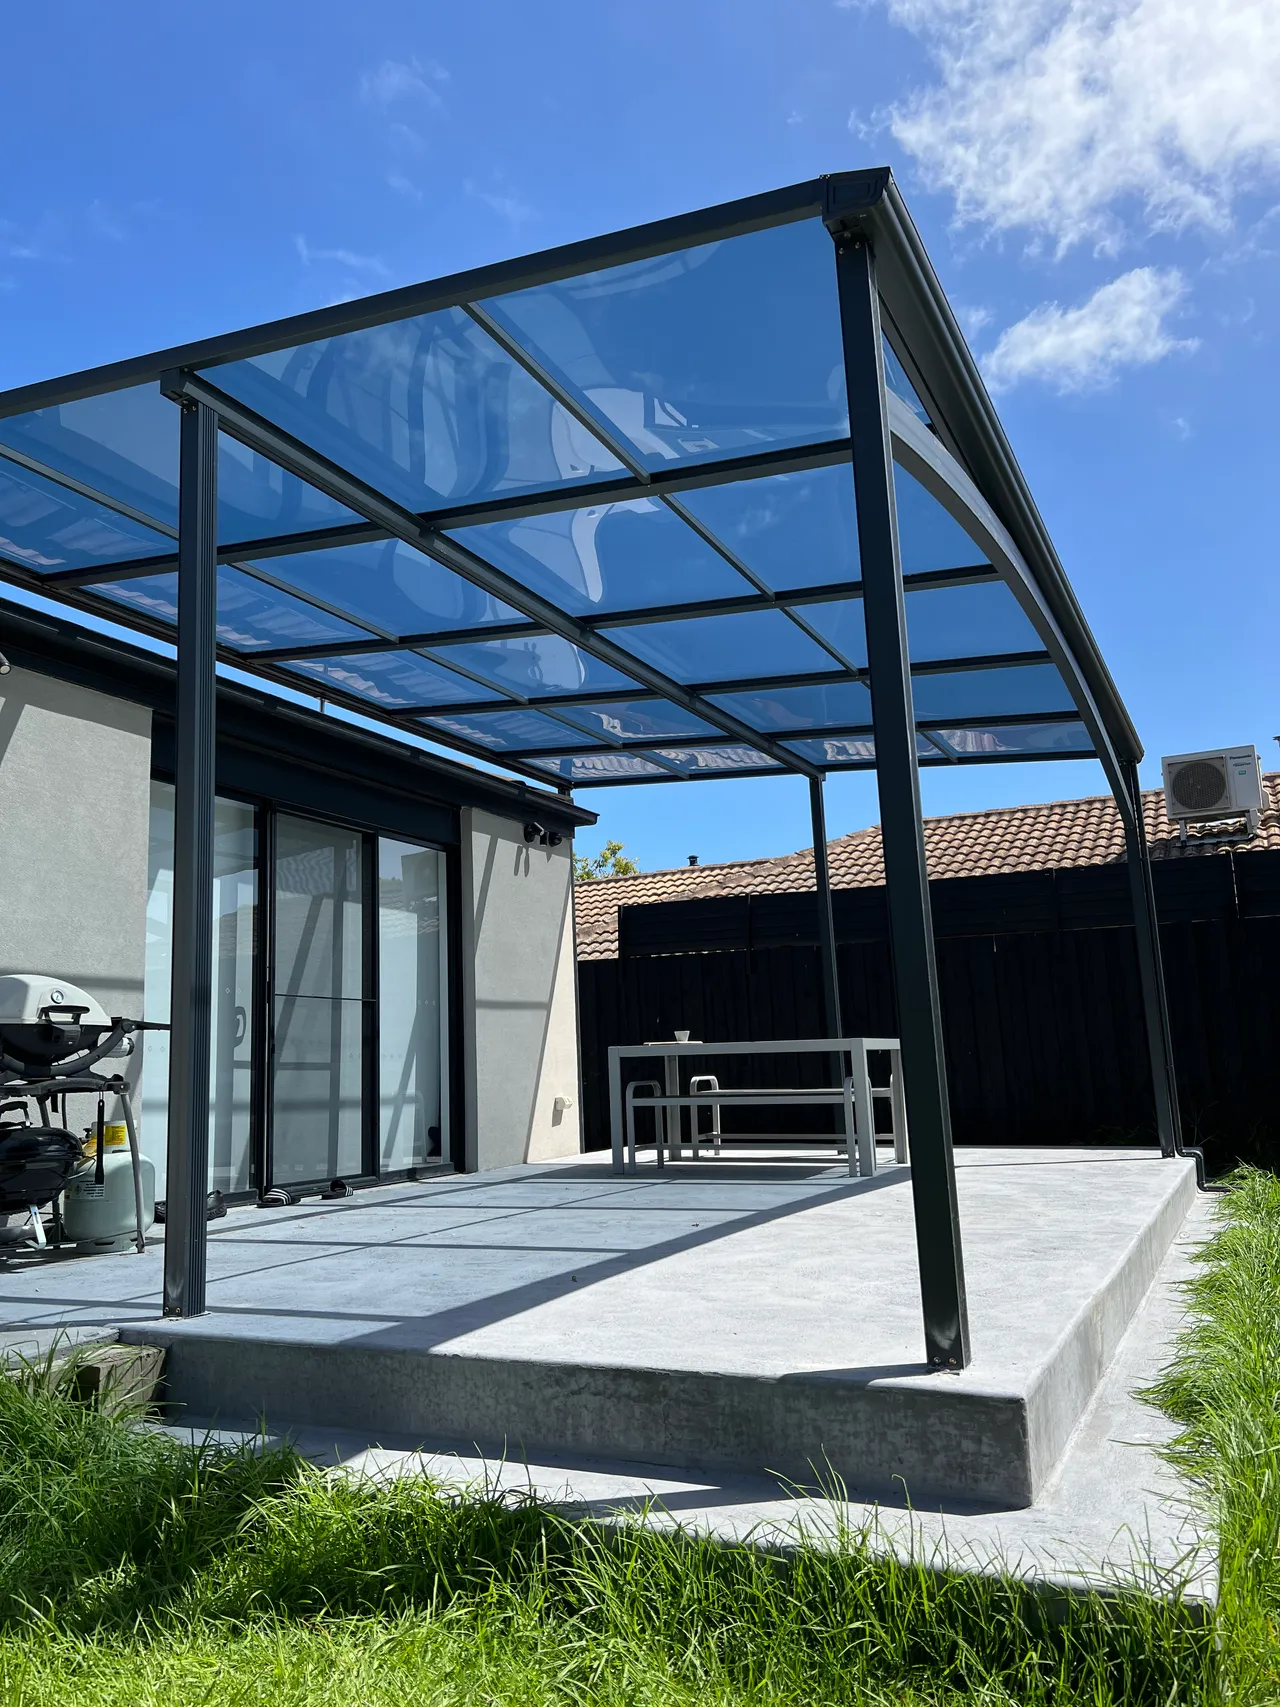
Roof brackets connect through to the roof trusses. A project-specific C-beam carries the nearly six-metre frontage between posts fixed to the concrete, leaving the opening free of a centre post.
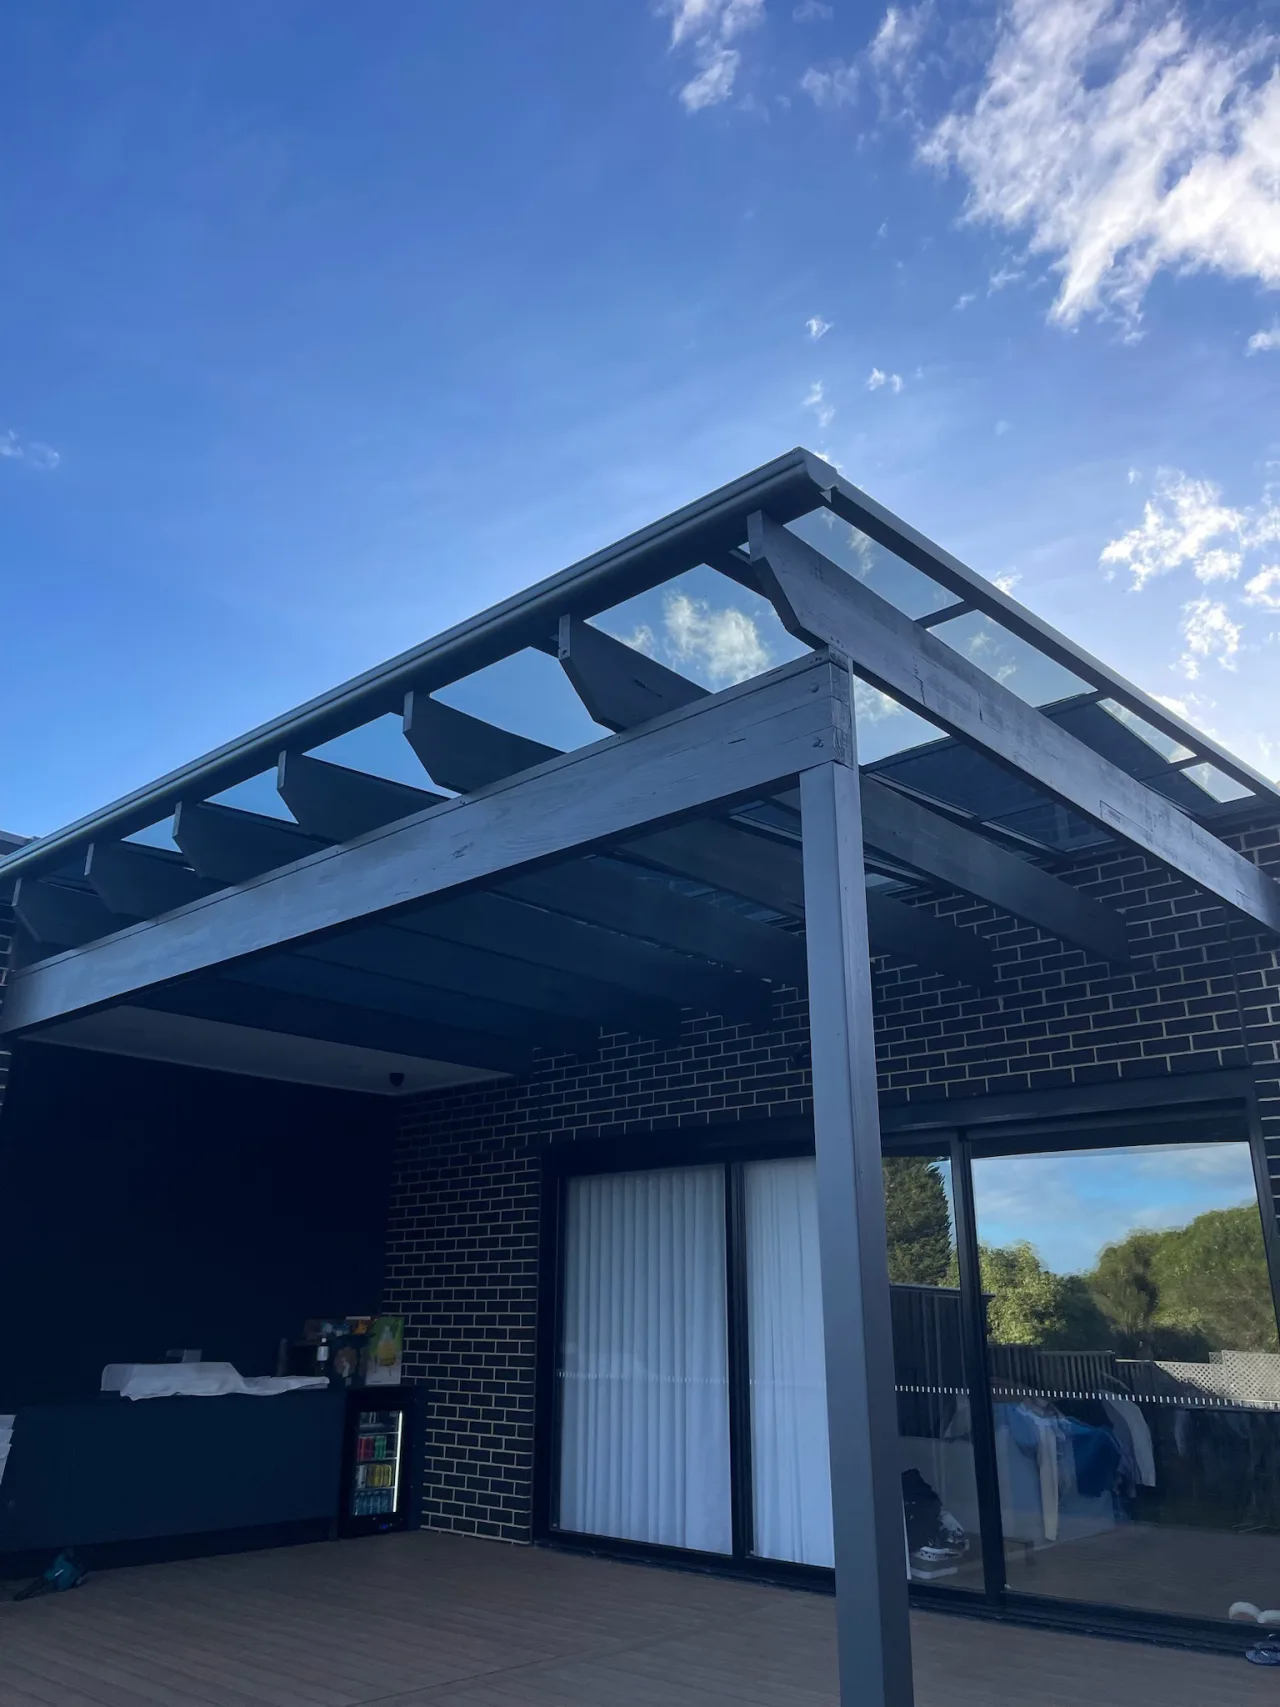
The original outdoor structure was retained while a connected, waterproofed Clearview roof system was installed above it, helping the homeowner use the space more often.
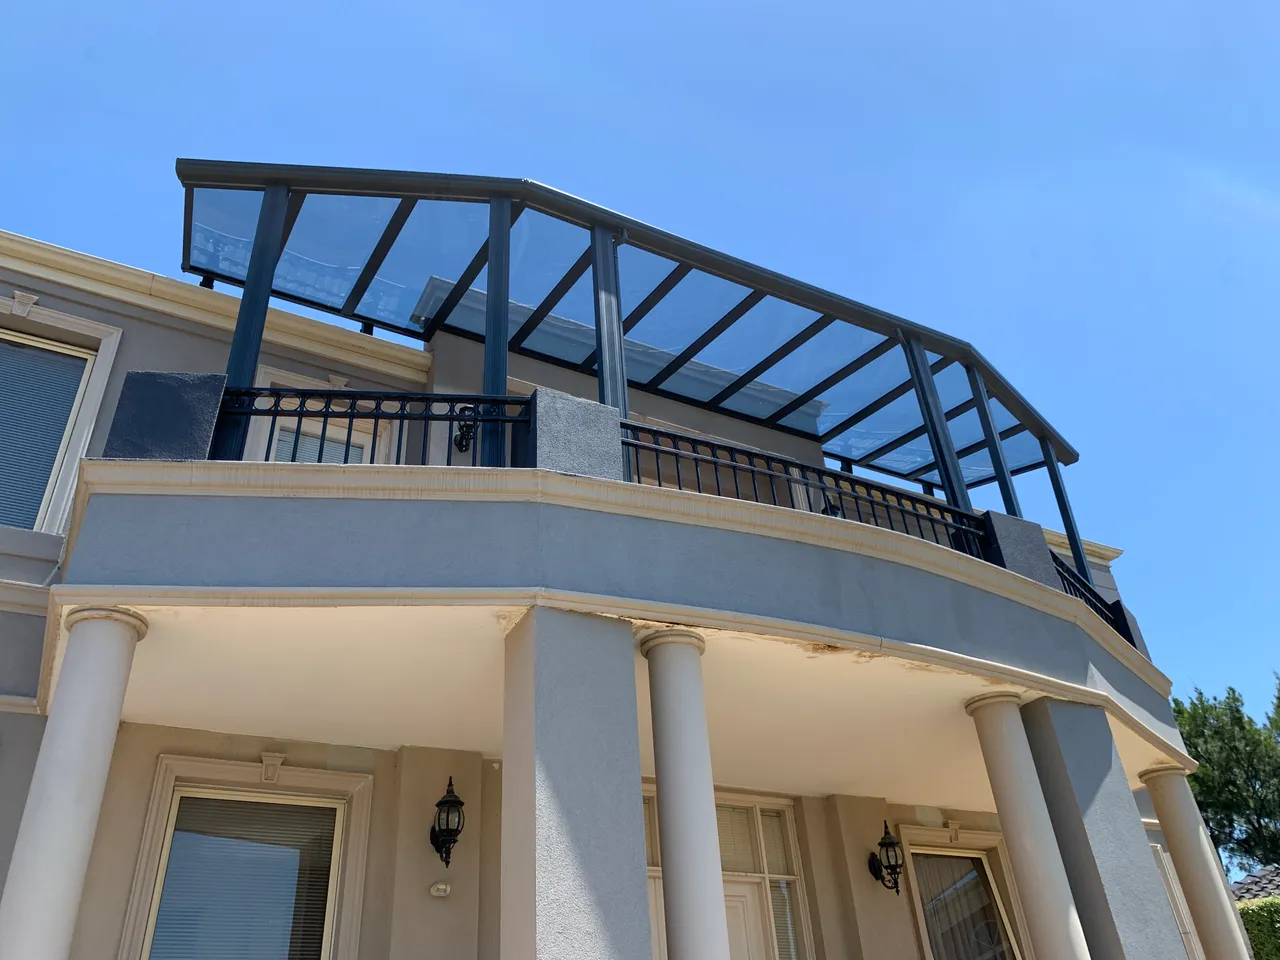
Straight framed roof bays change direction in stages along the curved balcony. Main support posts, an integrated front gutter and inward-positioned downpipes complete the visible system.